MP211 Series Hardware Manual
MP211 General Information
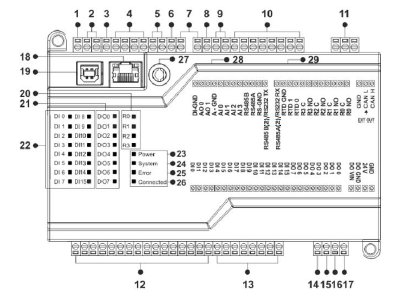
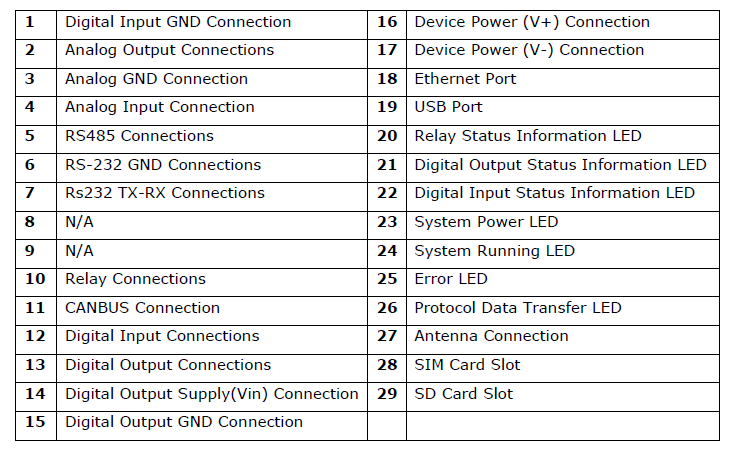
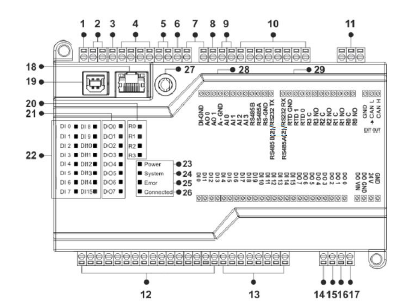
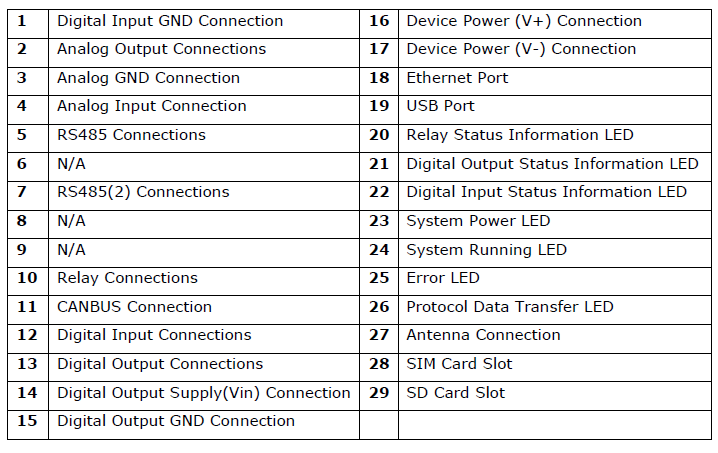
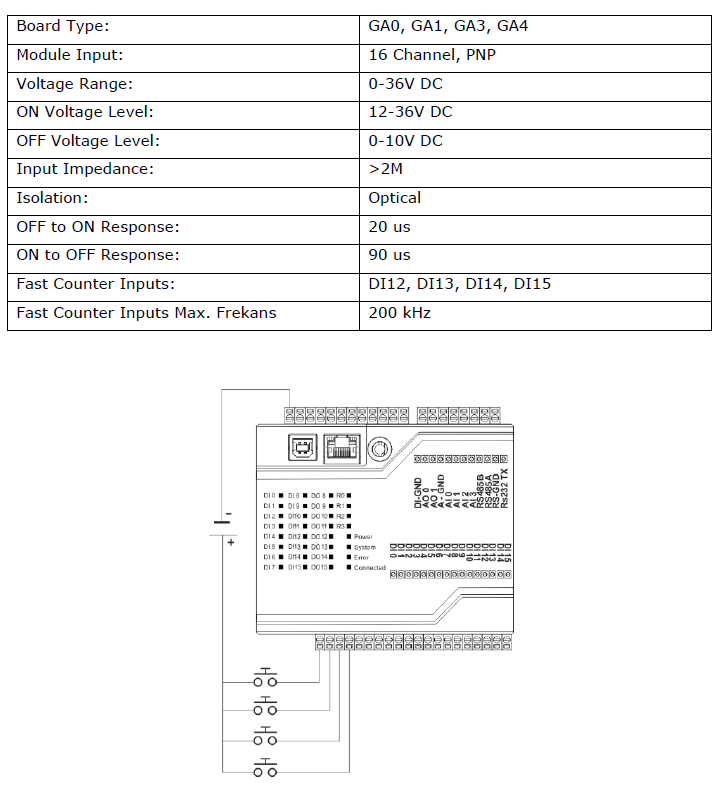
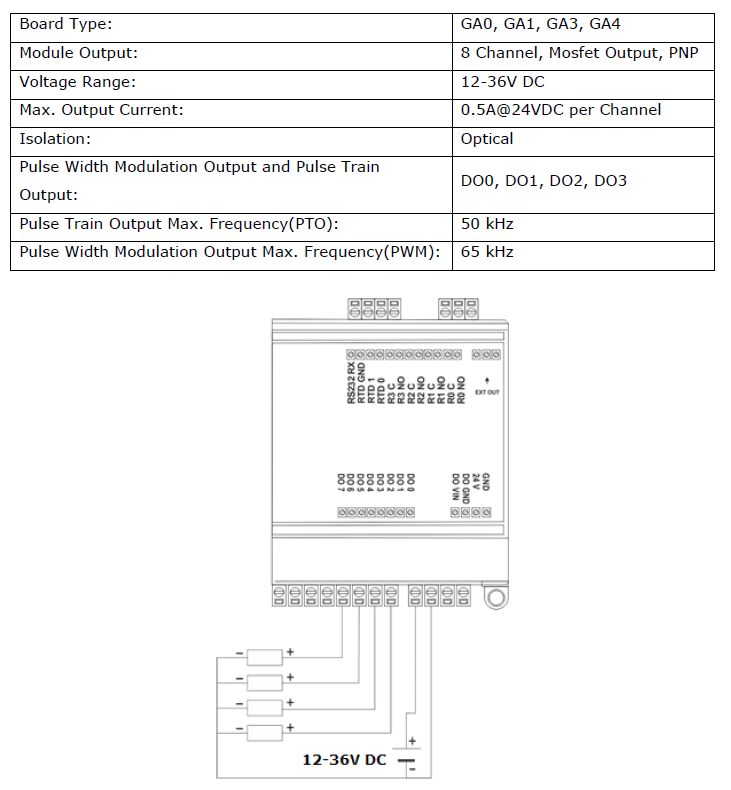
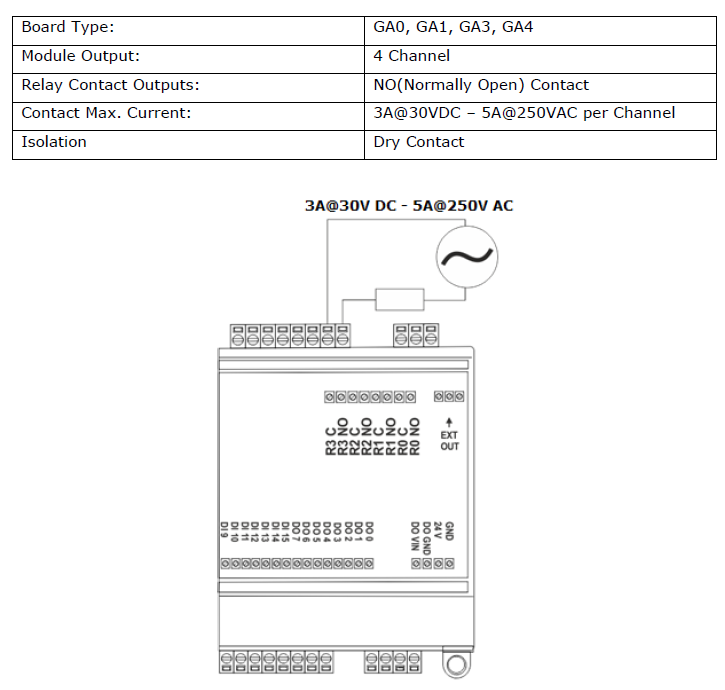
GA0 Board Type Physical Interfaces
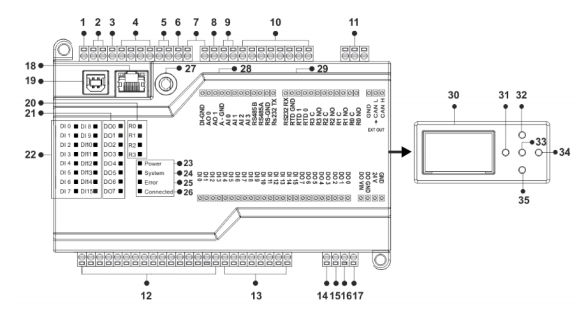
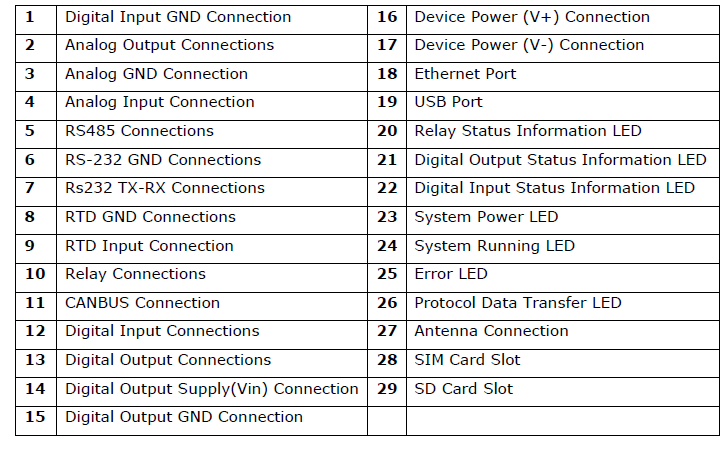
GA1 Board Type Physical Interfaces
GA3 Board Type Physical Interfaces
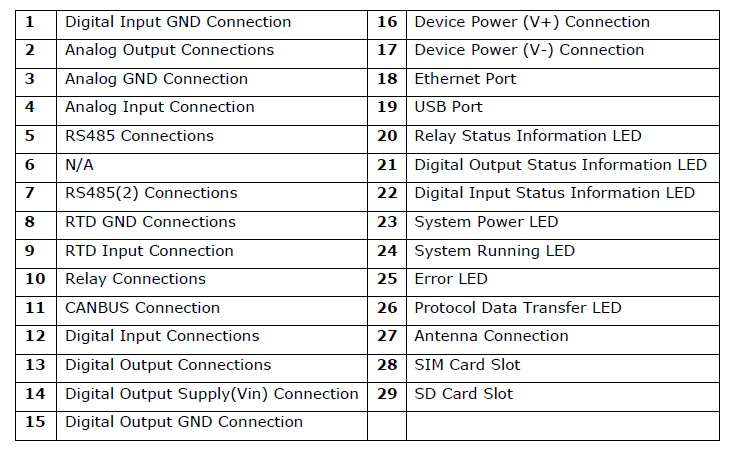
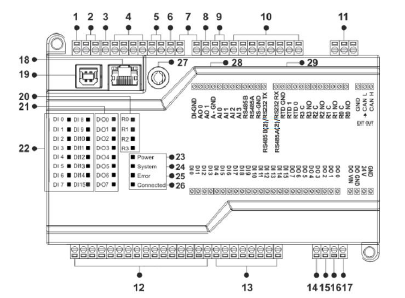
GA4 Board Type Physical Interfaces
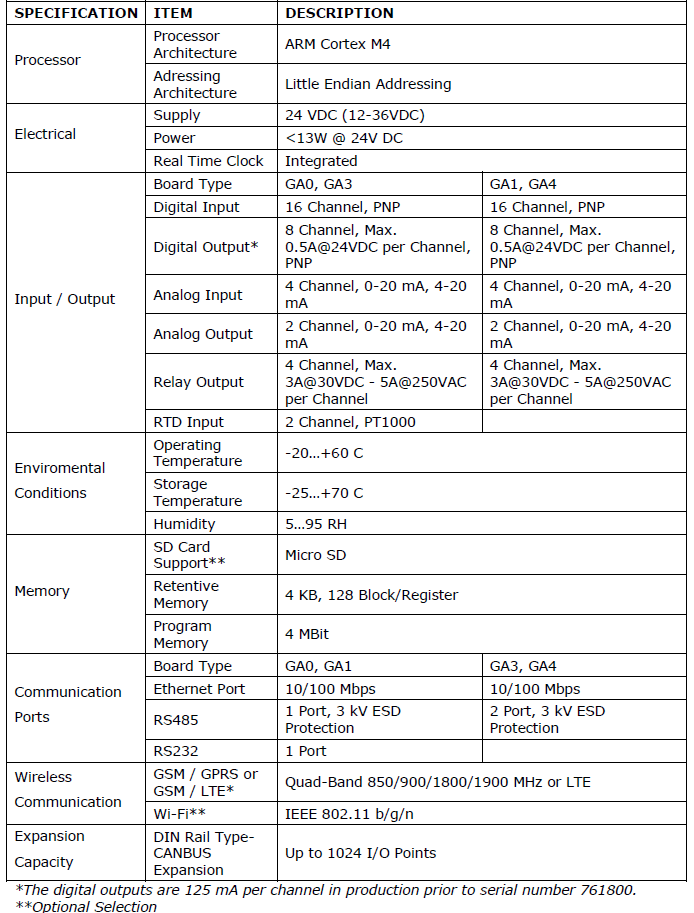
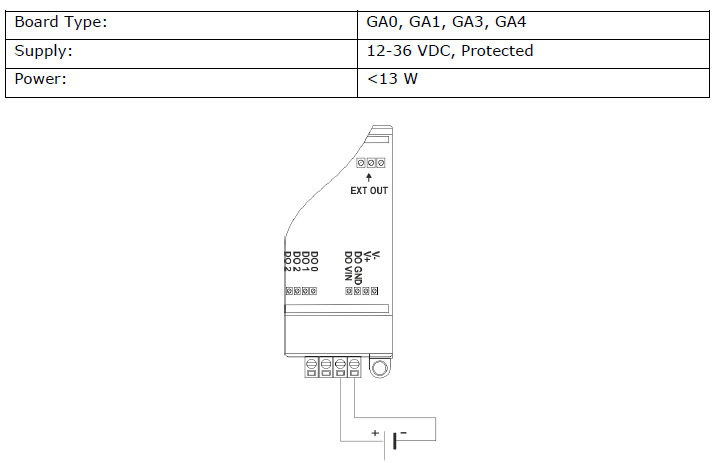
General Device Specifications
Installation Information
Rail Installation
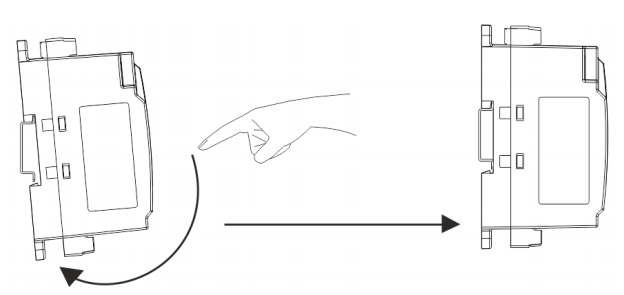
DIN Rail Mountage
First, the upper part of the device is mounted on the DIN rail. Then, with the help of the springs behind the device, when a lightly force is applied to the lower part, the device locates into the DIN rail easily and the montage is completed.
DIN Rail Demountage
To demount the device, firstly it is pulled from the bottom using flexibility of the spring, the device is removed from the DIN Rail and the demounting is completed.
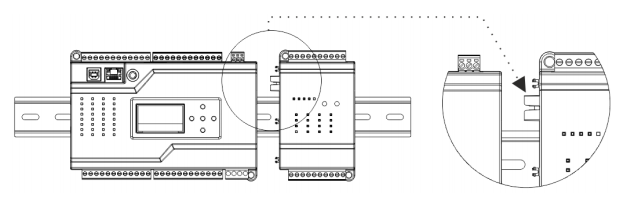
Expansion Installation
The MP211 product and its extensions are mounted by sliding over the rail in such a way that the connectors correponds.
Connection Diagrams
Supply Connection
Digital Inputs
Digital Outputs
Relay Outputs
Analog Inputs

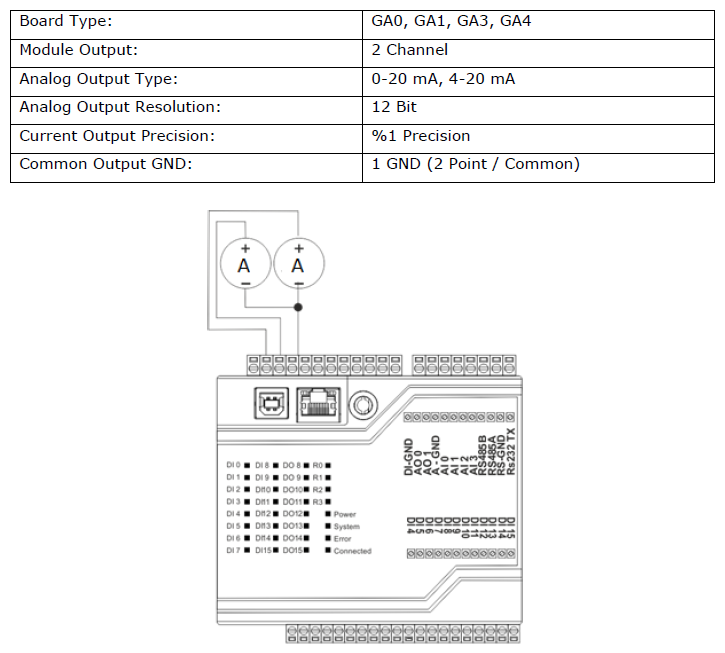
Analog Outputs
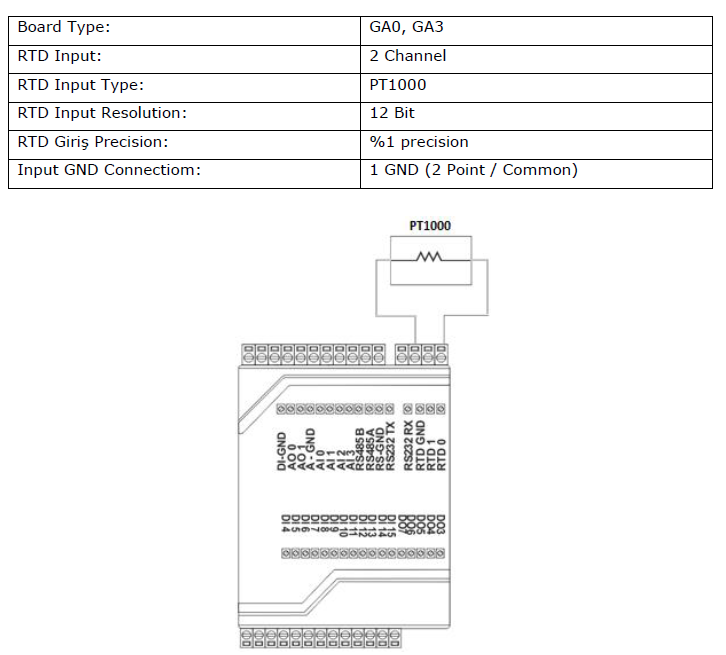
RTD Inputs
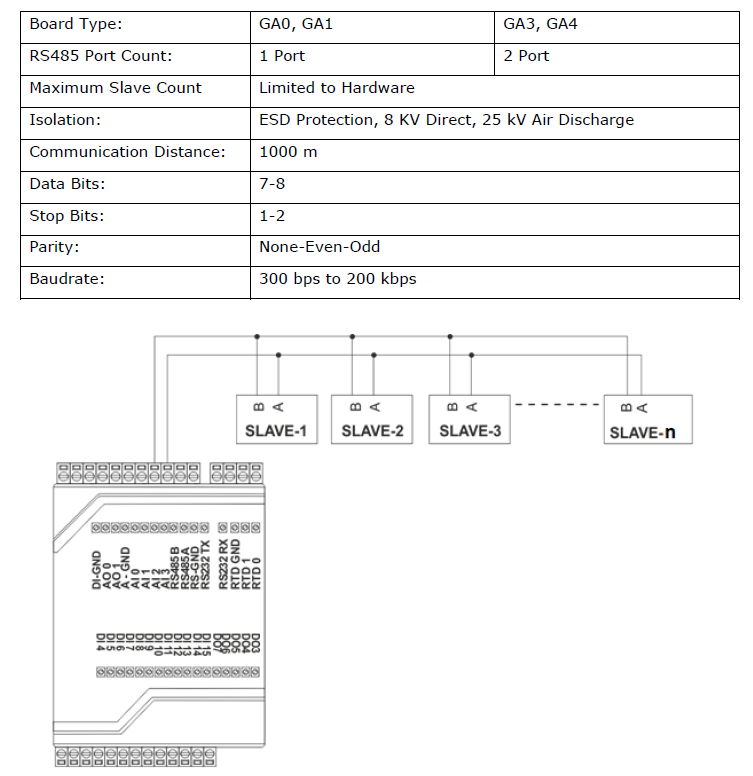
RS485 Serial Port
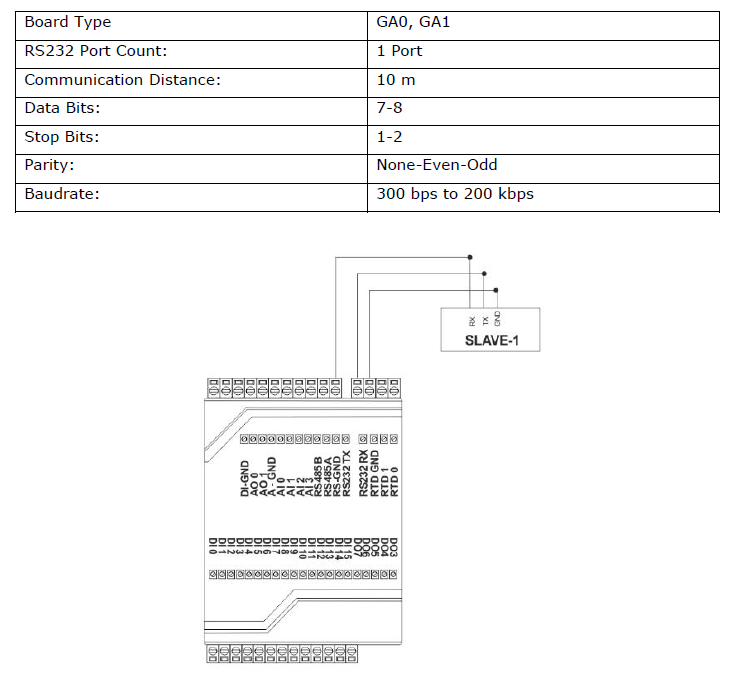
RS232 Serial Port