ViewPLUS SCADA Map Page
ViewPLUS Scada application has Geo Map Infrastructure support. Thanks to this feature, a map page can be prepared via ViewPLUS, and the status of the tag can be monitored on the map page in different images or colors by creating a category according to the tag value.
Geo View Feature
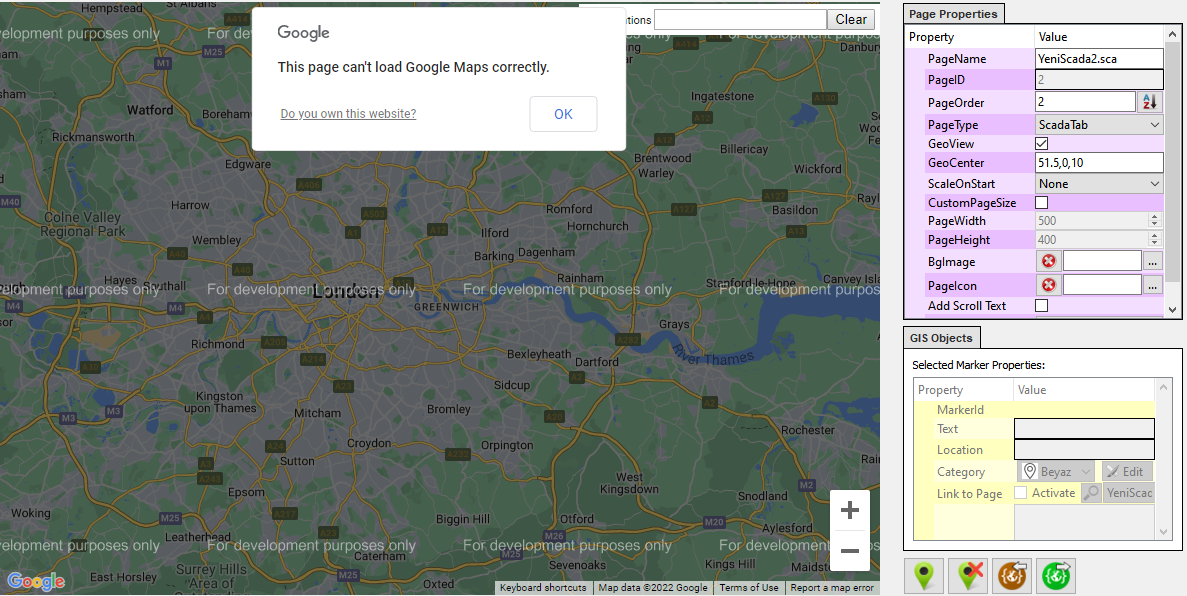
In the upper right corner of the ViewPLUS Scada Editor page, there are Page Properties. If this created page is desired to be in Map view, the "Geo View" option under the Page Type selection must be selected.
Geographical Infrastructure support of ViewPLUS Scada application works synchronously with Google Maps and ArcGIS applications.
To use the map page with the Google Maps application; Map API Key required. After entering the Map API Key, the "For development purposes only" text on the screen will disappear.
When the "Geo View" option is selected, the page is automatically updated with the Google Maps application.
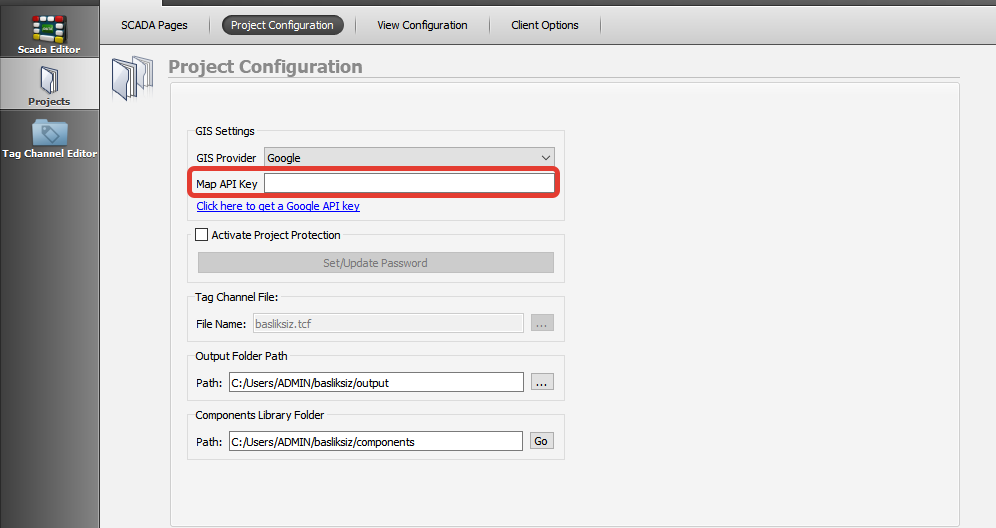
Select ViewPLUS Scada Editor -> Projects -> Project Configuration -> GIS Settings -> GIS Provider -> Google.
In order to update the map page according to the selection in the Scada editor of the selection, the editor must be closed and reopened.
Map API Key Enter ViewPLUS Scada Editor -> Projects -> Project Configuration -> GIS Settings -> Map API Key.
To use the map page with the ArcGIS application no map API password required, it's free software.
Select ViewPLUS Scada Editor -> Projects -> Project Configuration -> GIS Settings -> GIS Provider -> ArcGIS.
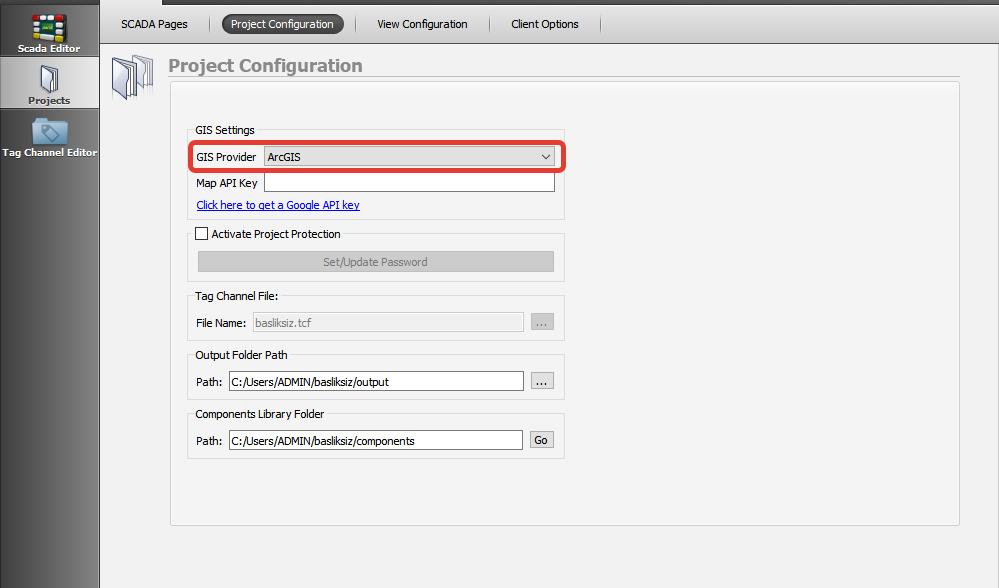
In order to update the map page according to the selection in the Scada editor of the selection, the editor must be closed and reopened.
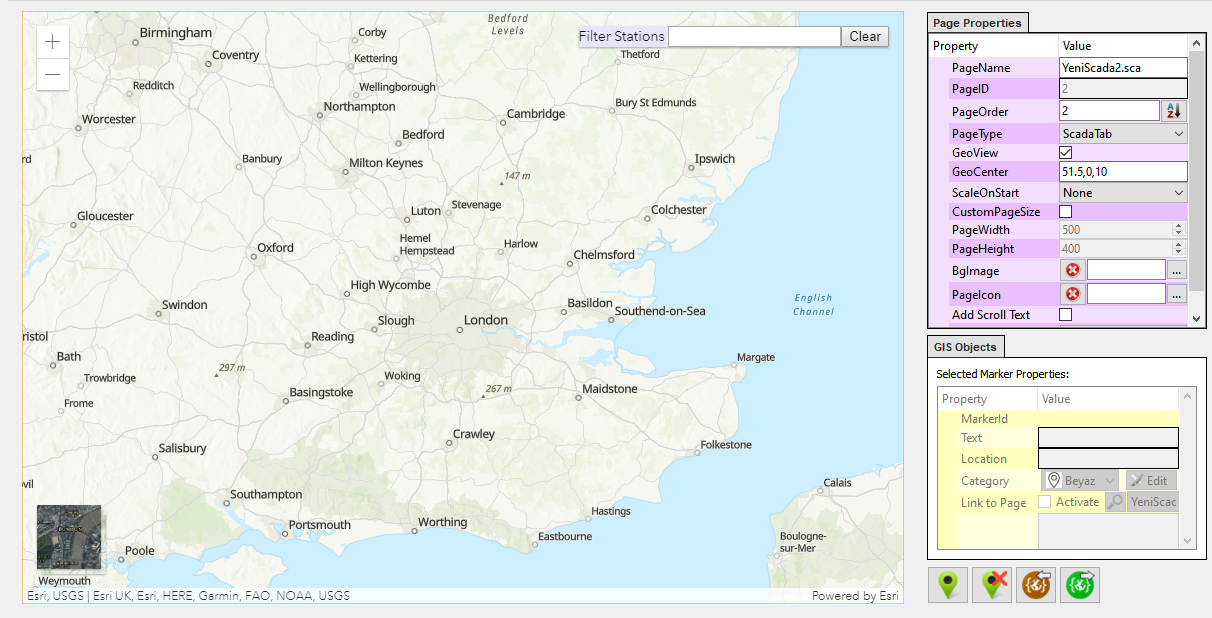
The map view can be changed with the option at the bottom left.
Map Page Icons
Label status can be monitored on the map by adding icons to the map page.
First of all, an icon should be assigned to the location where you want to add an icon to the map page.
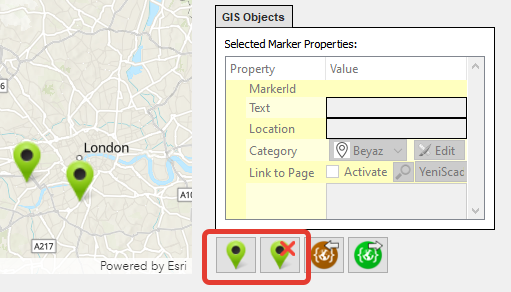
Click ViewPLUS Scada Editor -> Add Marker and mark the location on the map where you want to add an icon.
Icons will be assigned to the locations where you want to add an icon, as in Figure 6.
